Robyn Foss
Connect with Robyn
  • Home
  • Calendar
  • RSVP's
    • Software Class Info
    • Digital Crops >
      • In Person - Digital Café
      • Virtual Events
    • Weekend Crops >
      • Crops4U >
        • Toddhall Retreat Center >
          • SWC:3/30-4/2
          • AUG CC: 8/11-13
          • WWC 23 11/30-12/3
      • p2P Live St. Louis >
        • p2P Live Saint Louis MAR 23
        • p2P Live Saint Louis OCT 23
  • Pay Class Fees
  • Pay Crop Fees
  • Forever
    • Digitization
    • Forever Permanent Storage
    • Digital Scrapbooking >
      • Historian & Artisan
      • Forever Print Shop
  • CM Group
  • My Blog
  • Virtual Training Session
  • Digital Cafe Art
    • Sketch Parties >
      • Sketch Party Kits
      • Sketch Party Page Share
      • Retired Templates Index >
        • 2016 Templates & Samples
        • 2017 Templates & Samples
        • 2018 Templates & Samples
        • 2019 Templates & Samples
        • 2020 Templates & Samples
  • Videos
  • Contact Me
  • Product Suggestions

Font Manager - Jouranling Fonts

8/29/2022

0 Comments

 
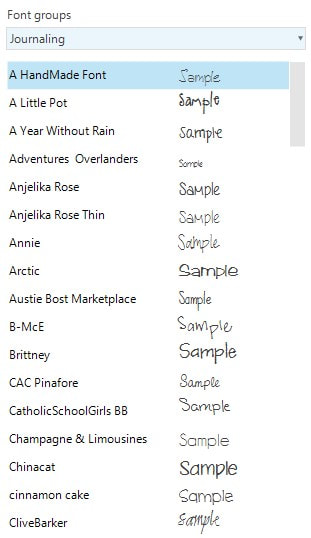
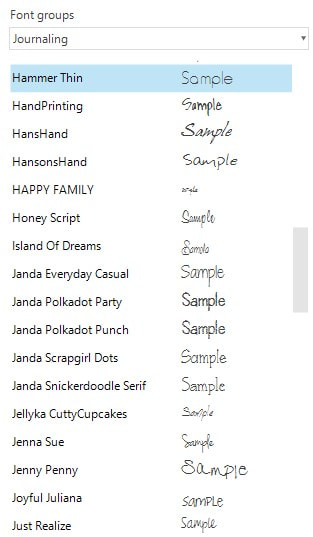
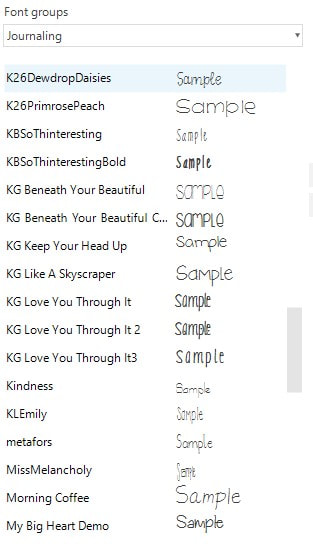
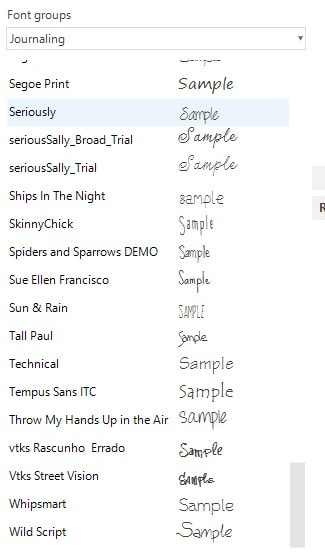
Last night during my Virtual Café I was asked what are my favorite fonts for journaling. I have LOTS of fonts. 1000's. So, my list of journaling fonts is quite long. I ended up taking screen shots of the fonts I put in the journaling group in the Font Manager in Artisan. 

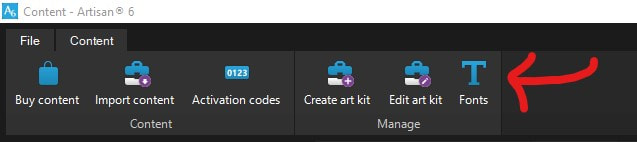
But, let's back up a minute.  Did you know that you can organize your fonts in Artisan? First, go to the Content Manager and then in the Manage section of the Content Ribbon, click on "Fonts."
Picture
Next, your font catalog will pop up. It comes pre-loaded with some suggested groups. You can add additional groups and remove any of their suggested groups that you won't use. Then, just select one of the font groups from the drop down list, select the font(s) you want to add to it, and then click add.
Picture
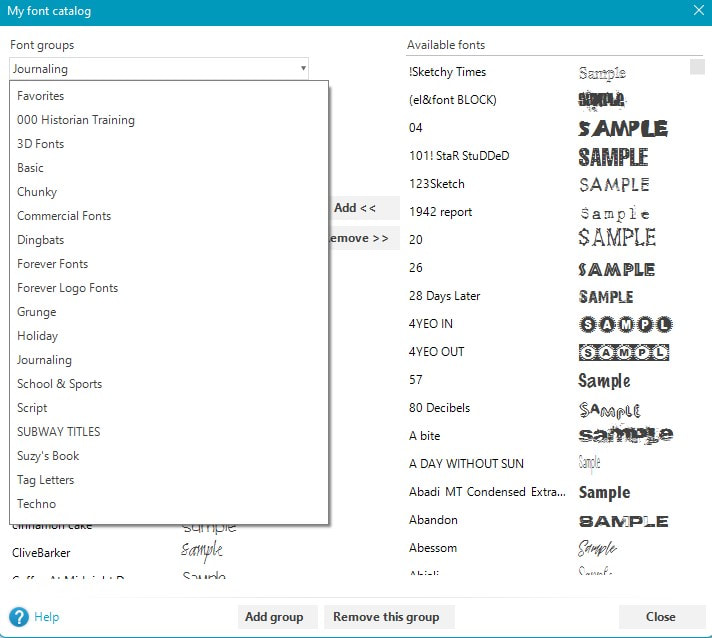
You will see these font groups at the top of your list of fonts whenever you are choosing the font for a text box or text shape.
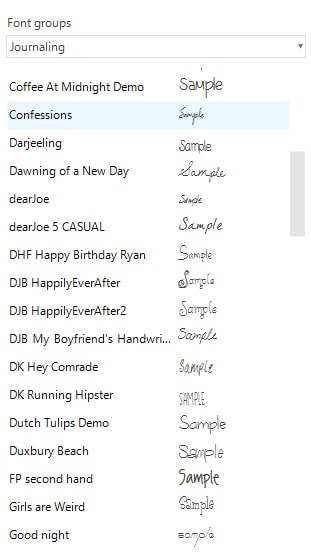
My Journaling Fonts


There are sites where you can get fonts for FREE and others that you can get bundles of them inexpensively. Here are some sites I have used before.


dafont.com: FREE
fontsquirrel.com: FREE

fontbundles.net: 
For purchase & some FREE
CreativeMarket.com: For purchase & some FREE

​There are many more, of course, but this will give you access to many to play with. 

0 Comments

Rainbow Paper

8/28/2022

0 Comments

 
Picture
Click to Open PDF Handout
0 Comments

Rainbow Puff Paint Titles

8/28/2022

0 Comments

 
Picture
Click to open PDF handout
0 Comments

Color Wash Layers

8/28/2022

0 Comments

 
Did you know that you can apply color wash in multiple layers to create a deeper cover of one color? 
Picture
Click to Open PDF of handout
0 Comments

Planning Wall Art with Artisan 6

8/23/2022

0 Comments

 
Picture
​When I found out that the faux canvases were being discontinued, I wanted to make sure I got my living room wall collage done before they went away August 31st.  Check out my YouTube video where I show how I used Artisan 6 to plan out the collage. 

 Video Notes: 
Here is the process I went through to plan out the wall of canvases. 
  1. Take a photo of the wall you want to put the collage on. 
  2. Measure the height and width of the wall.
  3. Determine where the collage should fit on that wall and mark down those measurements. 
  4. Create a new project in Artisan 6 with a custom size that matches the measurements you took; converting from feet to inches. (i.e. my wall was 18 ft. 11 in. wide & I converted to  19 in. in width for the project).
  5. Optional: Turn on grid lines (View>Settings>Guides)
  6. Mark the space where you want to place the collage with ruler tabs 
  7. Create rectangles to represent each size the canvases come in. Insert>Content>Shapes>Rectangle. I formatted the shapes to show text inside. 
  8. Design your own layout or get ideas online (Pinterest) and place the canvas placeholders within the space available until you are happy with the layout. 
  9. Group all shapes in the layout. Make a copy and center on the original group. Hide one group and lock it. 
  10. Ungroup extra set Hide text: Right Click>Text>Format>Do not show any text. 
  11. Change each shape into a photo opening. Right Click>Fill>Convert to a photo drop point.
  12. Look through your photos to find a group of photos that you would like to use and add them to the project.
  13. Play around with the photos in your wall collage layout until you are happy with how it looks. 
  14. Now you will create a canvas for each part of the collage. I replaced the photos with an image of the canvas so I could see how they will look together. 
I plan to use this layout after the canvases arrive to help me place them on the wall.  I hope this helps some of you. 

My Canvases  :)

0 Comments

    Author

    I've loved photography all my life. Have been making photo albums since high school.  I love helping people do something memorable with their photos. Have so much fun planning workshops for people to get together and work on their photo projects, share stories and fellowship.  Looking forward to making this even easier with new products that will make it a snap to finish.

    Archives

    March 2023
    February 2023
    January 2023
    December 2022
    September 2022
    August 2022
    May 2022
    March 2022
    February 2022
    September 2021
    August 2021
    January 2019
    February 2017
    November 2013
    October 2013
    September 2013

    Categories

    All
    Artisan 6 Tips
    Cards
    Digital Updates
    Historian 6 Tips
    Page Ideas
    Personal Share
    Product Update
    Project Ideas
    Website Update

    RSS Feed

Robyn Foss
Cell: 314-368-7732 (Texts OK)
Email: cmrobyn@gmail.com
www.robynfoss.com
https://www.forever.com/ambassador/robynfoss
http://www.creativememories.com/user/robynfoss

"Like" me on Facebook
Sign up to receive updates

View Past Issues of E-Newsletters