
|
|
|
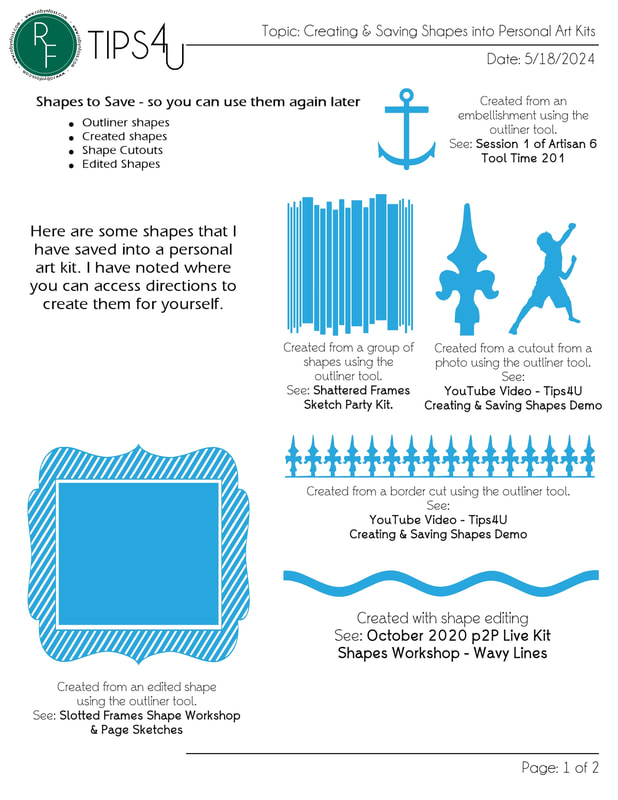
I was chatting recently with someone working on organizing her content. If you are just starting this process, using categories gives you a quick way to throw entire kits into an organization system. You can group them by seasons (Spring, Summer, Fall, Winter), holidays (New Year's Day, Valentine's Day, etc.), digital artist (Cottage Arts, Mags Graphics, Seatrout Scraps, etc.), themes (birthdays, travel, boyish, girly, etc.), styles (art deco, farmhouse, etc.), and more. Other uses for categories:
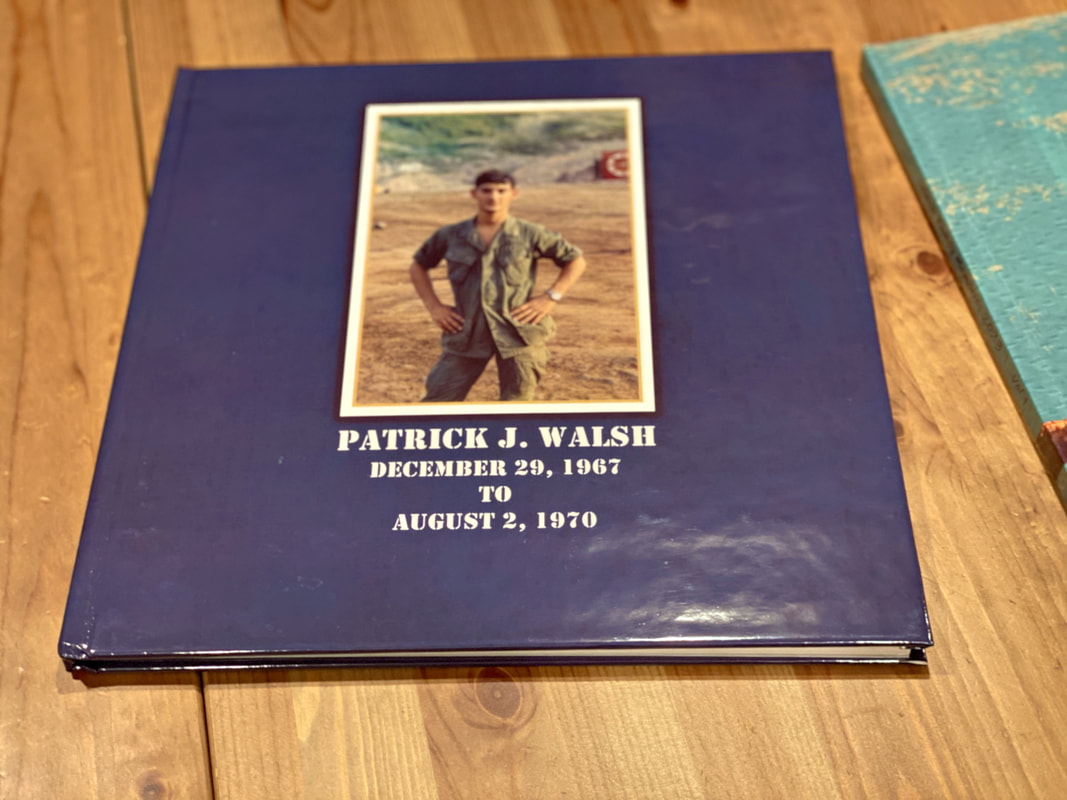
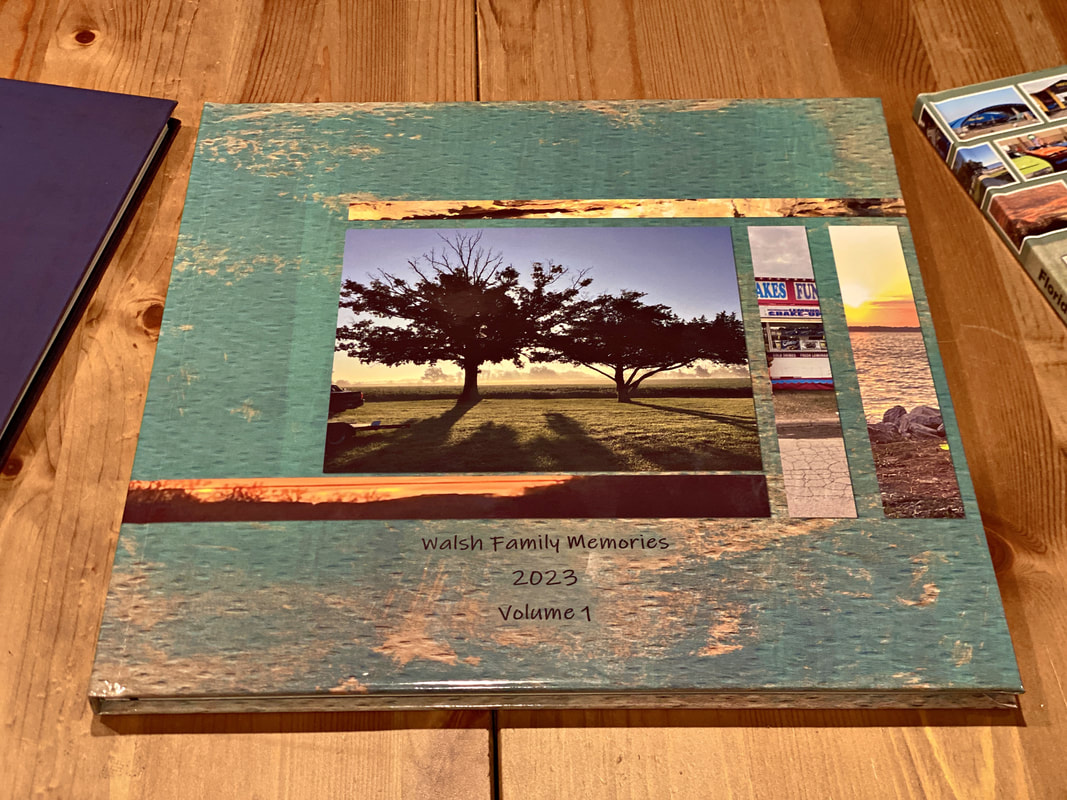
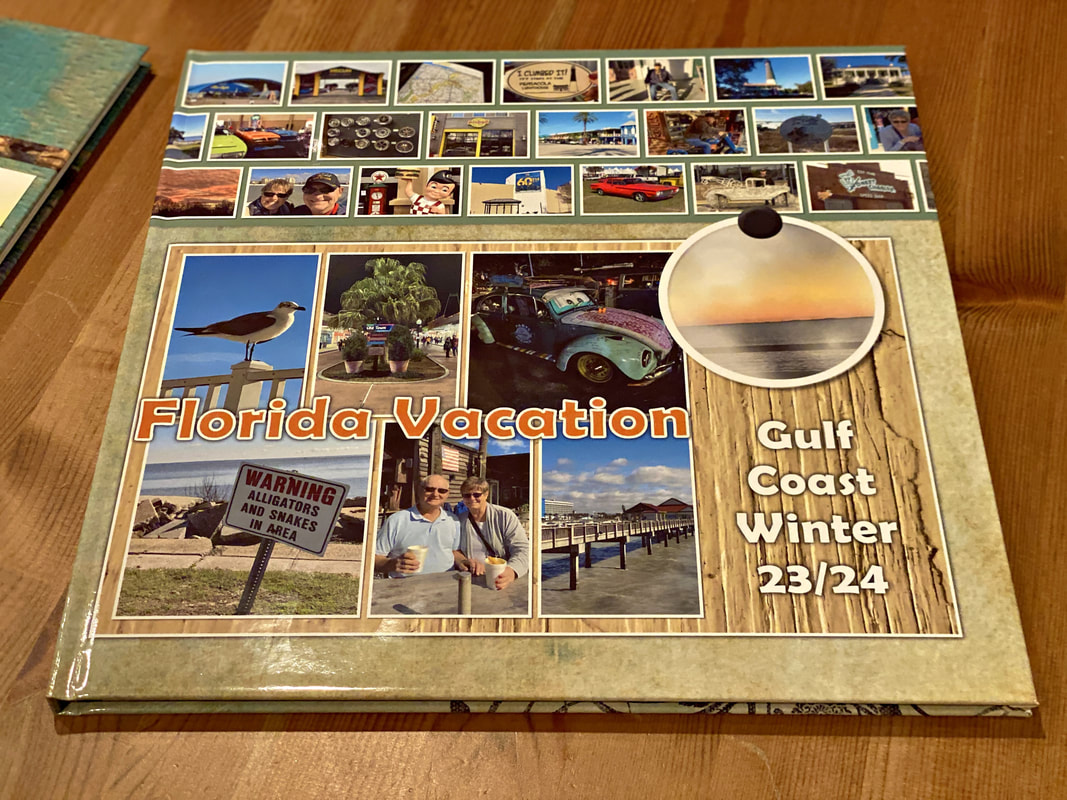
Below you can see some screen shots I took of my categories. I hope this helps you get started on organizing your content. More training can be found in the getting started guide (see page 27). Click the blue button to open a handout on this topic from the Getting Started Guide. 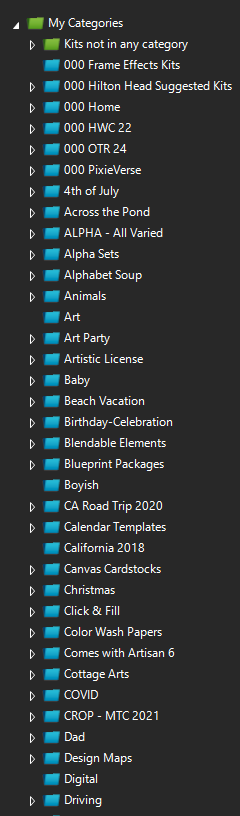 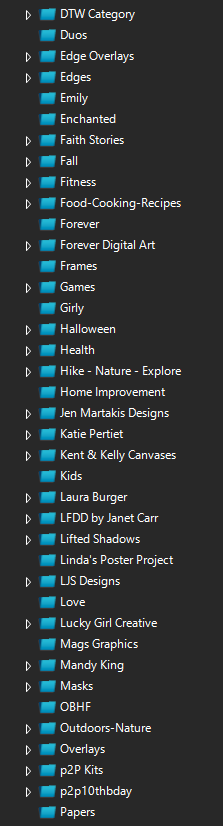 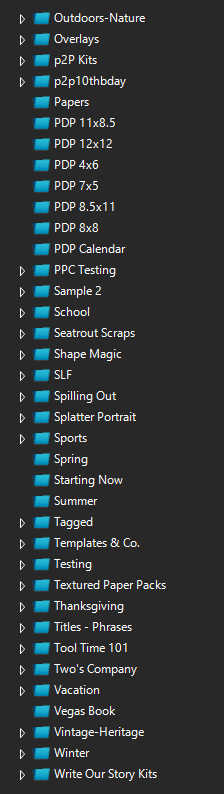 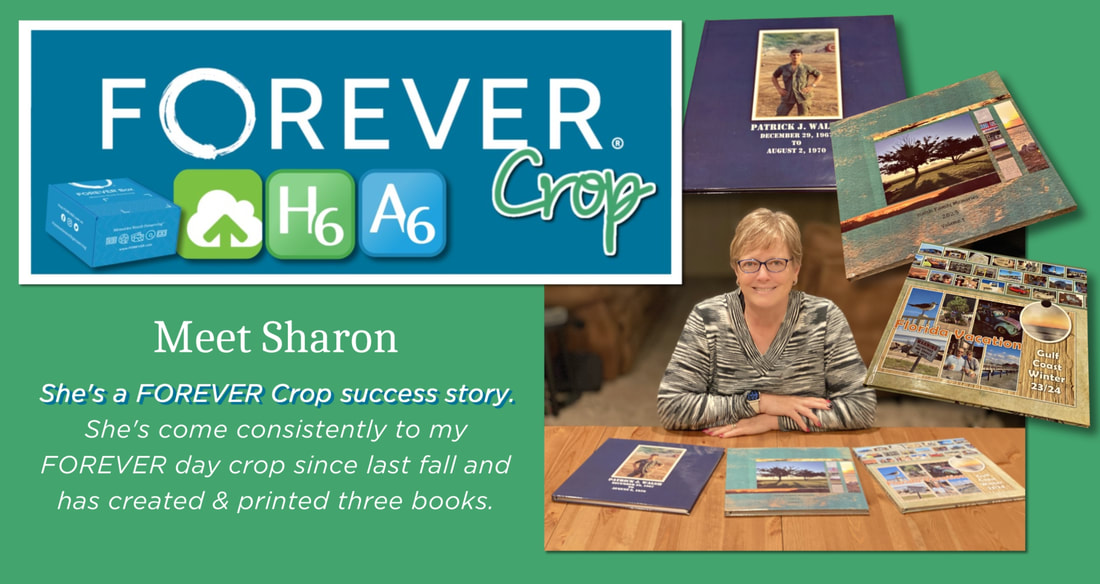 I met Sharon March 2023 at a scrapbooking weekend where I was a vendor for FOREVER. May of 2023 she purchased both Artisan 6 & Historian 6. She also signed up to take my beginner classes for both. She finished both classes and started attending my Digital Cafes. I believe all of these helped her to get going in Artisan. Her first book was a reprint of a traditional scrapbook she had digitized. Once her pages were in FOREVER, she used the 12x12 Scrapbook Page Project Bundle by pixels2Pages to create a photo book. She added a few pages and ordered two copies for her sons at the beginning of December (just in time for Christmas). The thing that I believe helped the most is that she has come to my FOREVER Day Crop starting in the Fall of 2023 She committed a few hours every Monday to work on her books. In January she attended a weekend retreat and she said to me, it feels like my page needs something. It was then that I knew she was ready for the next class Artisan 6 Tool Time 101. She watched week 1 and learned all about finishing touches she can put on a page and fell in love with overlays. We reviewed her project before ordering and I gave her a few tips and reminded her on how to add shadows, glows, etc. to finish her pages. She was able to order her second book in January 2024. This was a book about fun activities & adventures from 2023. In the next month she was able to complete her third book almost completely on her own. This vacation book was ordered just over a month after she returned from the trip. Amazing!! She's still learning & having fun, but working on it regularly helps her to start where she left off the last time and there is less re-learning what she figured out the time before. Congratulations to Sharon for your great progress with your photo projects. Tips to Take Away:
I'm here to help you. If you'd like to make more progress than you are, let's connect and see how I can help. After the recent update to Artisan 6, the Remember Tool is back. Watch the video below to see how to turn it on and some basic ways to use it. With Costco shutting down it's photo services, many customers were directed to Shutterfly to print their photos. I have run into quite a few people who are not happy with the printing quality at Shutterfly and they are on the hunt for a new print provider. Right now is a great time to give FOREVER a try. With FOREVER Photo Prints you get quality and value. Right now through the end of the month, photo prints are 50% off. Looking at the chart below, if you ordered 200 photos, that would be $29 when they are 50% off. If you are new to FOREVER, you will get a $20 coupon you can use toward your print order. So, you would pay $9 plus shipping. This weekend, there is FREE shipping on orders of $139 or more ($99 for club members). I have ordered sample prints in both lustre and glossy. Both are beautiful. 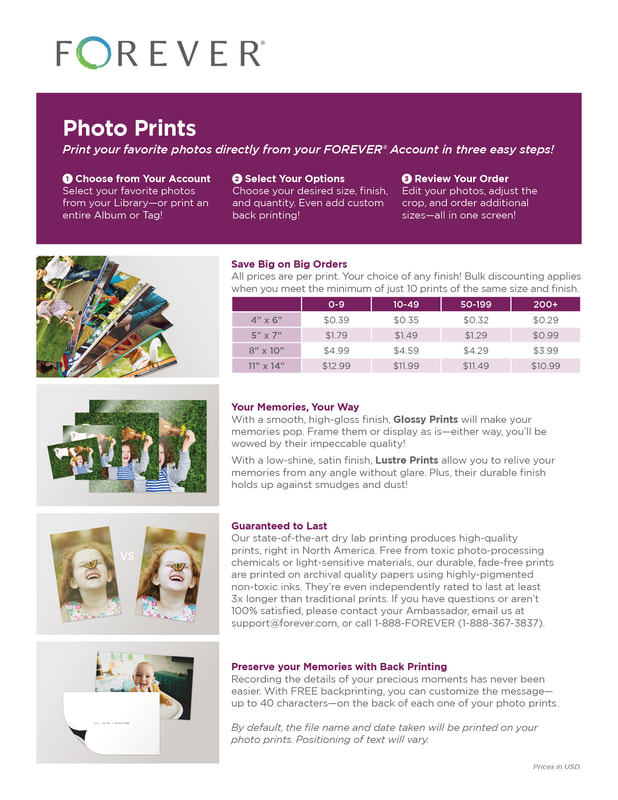 During week 2 of my Artisan 6 Beginner Class we discussed the process of print preview. During class we covered the warning screen that you see after preview and before upload.  The third point states: "I understand that if my monitor is not properly calibrated that the colors on the printed material may not match exactly what I see on my monitor." I have actually had this happen. Back in May 2016 I ordered a hardbound storybook from FOREVER. I noticed that the blues were way off.  Above: What I saw in my screen. Below: The printed book. 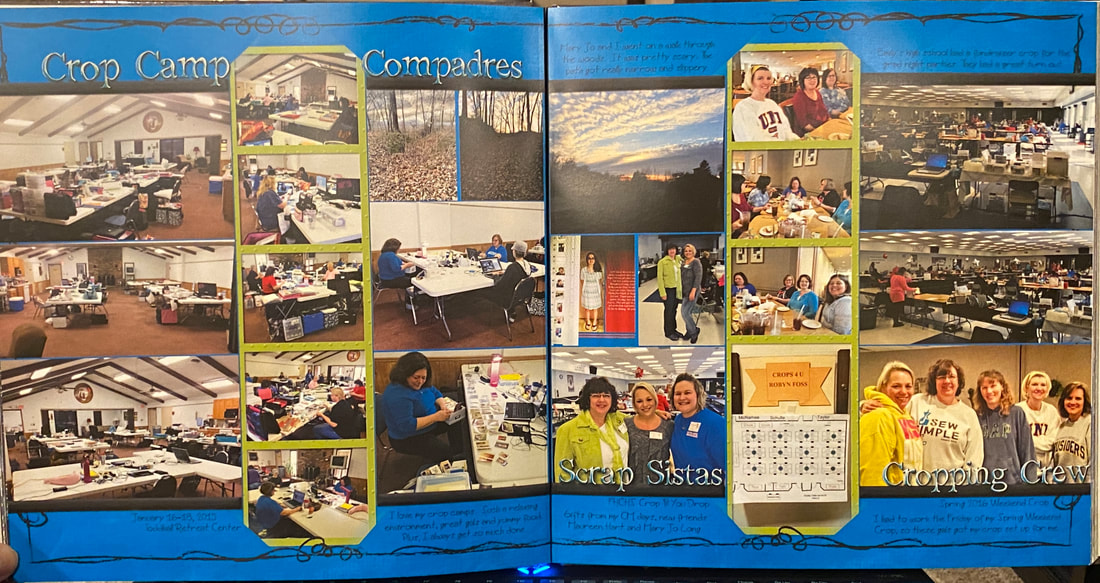 Below: Side by side: my screen and the book.  This is when I understood the importance of monitor calibration. I found out from another FOREVER ambassador what they used to fix this. There is a product by Datacolor called Spyder. I ordered it and have loved it. I haven't had an issue since. Below is a link to check it out on Amazon and a screen shot showing the product in use during calibration. 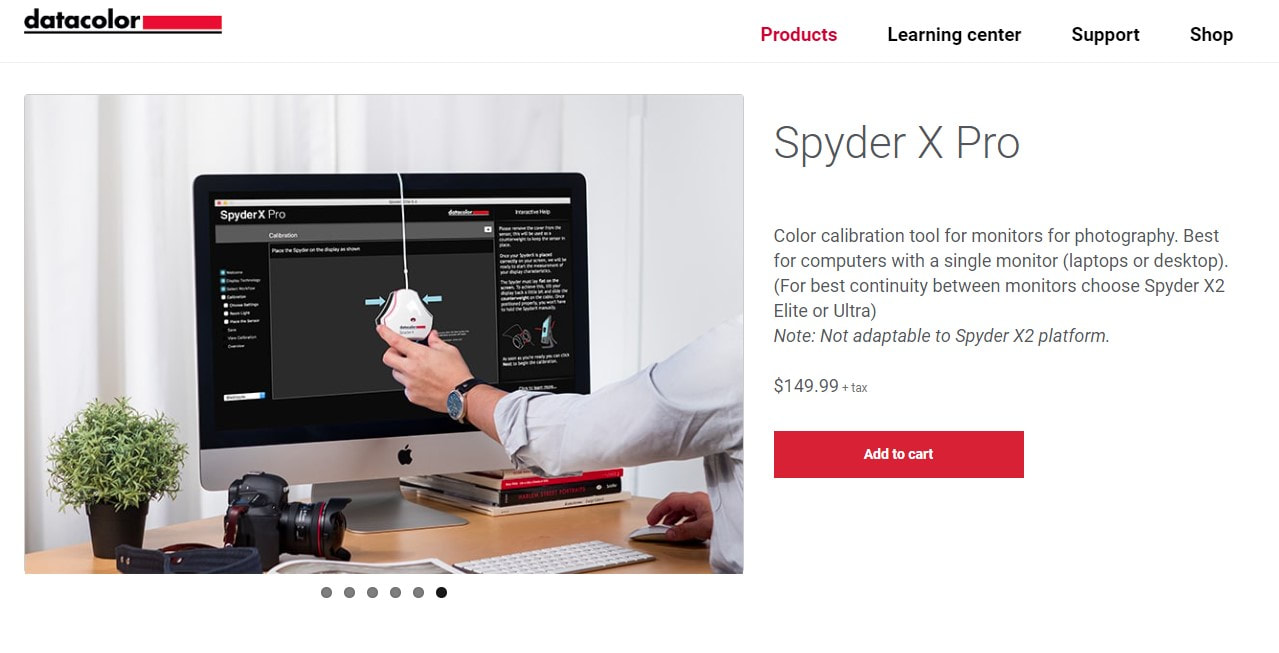 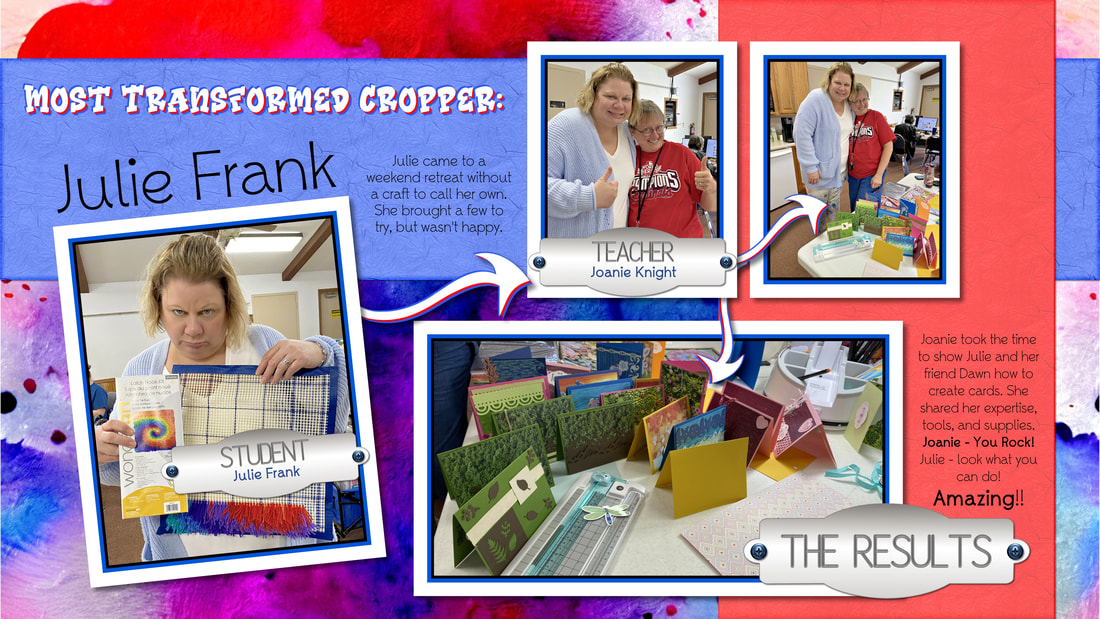 At my Spring Weekend Crop, Julie and her friend Dawn attended together. They were both joining the crop to have time with friends and checking out different crafts to find out what was their "thing." Julie brought some coloring books and a latch hook kit. She wasn't really enjoying the latch hook kit. Another attendee, Joanie Knight, noticed her frustration. She offered to teach them how to make cards and they said yes. So, the next day they started their day with an impromptu card making class. Joanie was so gracious with her knowledge, supplies, and tools. Her students were ecstatic and Julie found her "thing." She had so much fun the rest of the retreat making cards. Yeah!!!
Thanks Joanie for your generous spirit! Great job Julie on your very productive weekend! 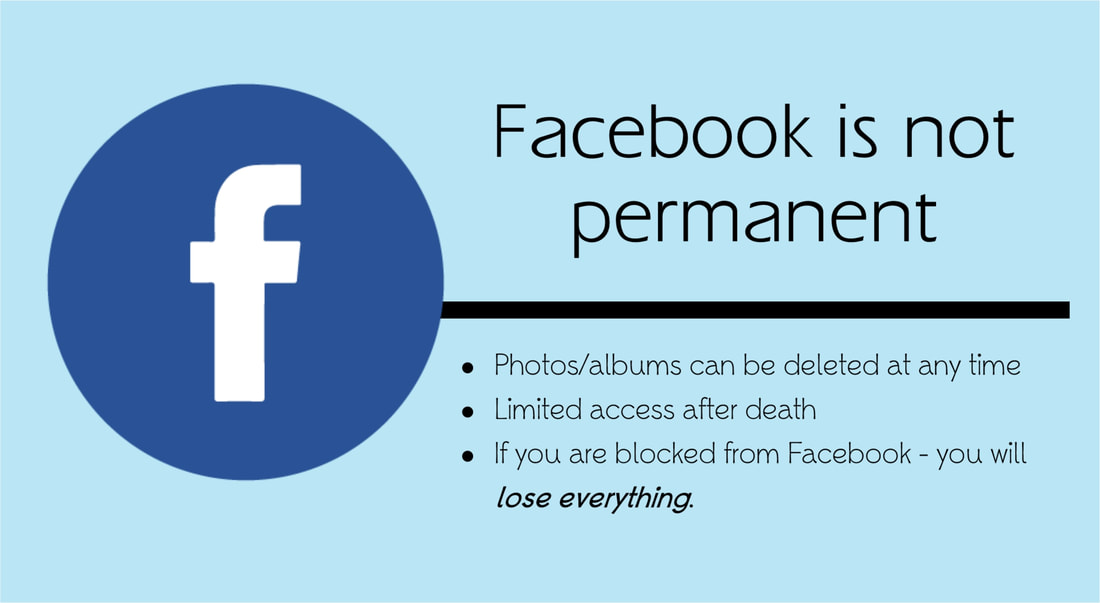 Do you use Facebook to store your photos? I love to share photos on Facebook, but it is not my photo storage solution. I have had entire albums of photos get deleted by Facebook. Recently, I met two people who had their accounts hacked by someone & then the hackers started posting terrorist propaganda on the person's Facebook page. All of a sudden, they were banned from Facebook and their account was closed. What does this mean? Well besides missing out on being connected with friends and family... it also meant that they lost all their photos stored in their account. Facebook wouldn't let them in to get their photos. Please consider FOREVER permanent storage to back up your photos. https://www.forever.com/ambassador/robynfoss/preserve-and-share  FOREVER Storage: Creating an account, connecting with Friends & Family, and sharing albums.2/26/2023 I am so proud of all of my clients who are uploading photos, movies, and more to their account, adding the story, and organizing. Here is a video and three handouts to help you get your family and friends connected. Sometimes when you are working with group photos it is easier to just use manual face tagging. This way you don't have to reply to each face you want to ignore. 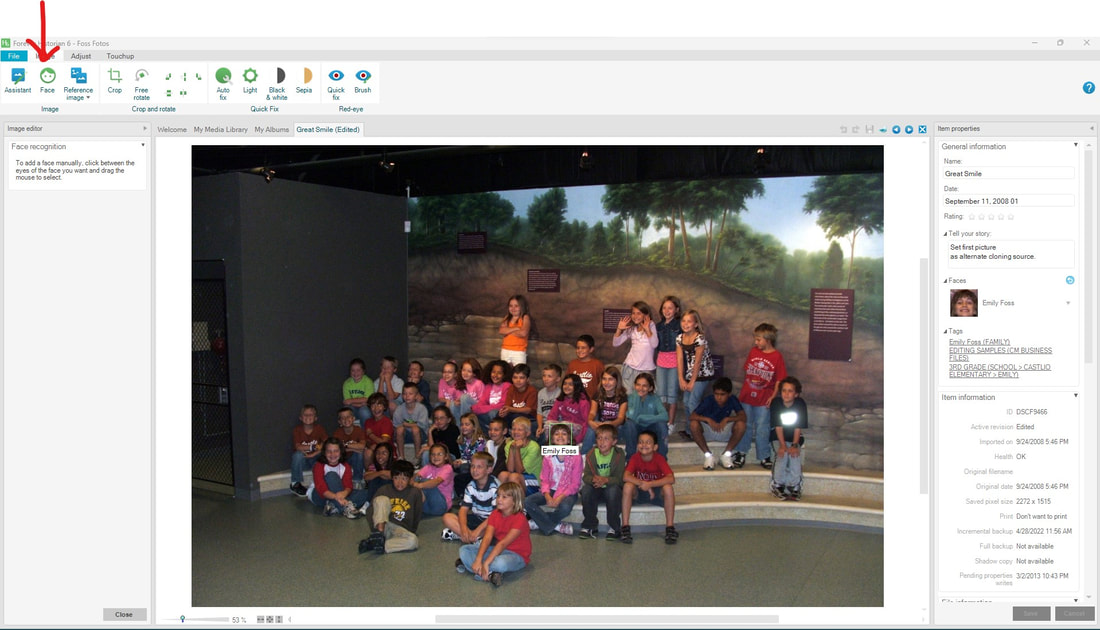 Open the group photo in Historian 6. On the Image Ribbon, in the Image Section, left click on Face. Move your mouse pointer in between the eyes of the face you want to tag and then drag your mouse to the right until the square covers the face. Pop up menu appears. Click "select to add a face." From the drop down menu, you can either add a new face tag or select from a list of existing face tags. Using this method, you can tag the few people you want and ignore the rest. |
AuthorI've loved photography all my life. Have been making photo albums since high school. I love helping people do something memorable with their photos. Have so much fun planning workshops for people to get together and work on their photo projects, share stories and fellowship. Looking forward to making this even easier with new products that will make it a snap to finish. Archives
May 2024
Categories
All
|
 RSS Feed